CakeDC Blog

TIPS, INSIGHTS AND THE LATEST FROM THE EXPERTS BEHIND CAKEPHP

CakePHP Facebook login using CakeDC Users Plugin

IMPORTANT: This tutorial is old, please check the updated Facebook version for CakeDC Users Plugin 3.1.5


If you are using an old version, we recommend to migrate to latest version of the plugin. We'll keep this article online for some more time....


The CakeDC Users Plugin provides an easy way to integrate Facebook social login into your application.

This is a short how-to tutorial to enable Facebook login. We'll assume you have a brand new CakePHP 3 application already setup.

Setup

Use composer to install the CakeDC Users Plugin

        composer require cakedc/users:~3.1.0
        composer require opauth/opauth:1.0.x-dev
        composer require opauth/facebook:1.0.x-dev

Now update your composer.json file adding the following repository override, to use our own fork of the Facebook Strategy, as the main repo is not maintained

        "repositories":
        [
            {
                "type": "vcs",
                "url": "https://github.com/CakeDC/facebook.git"
            }
        ],

Note we are using the 3.1 version, matching the CakePHP 3.1 compatible version of the Plugin, check the compatibility matrix to find the right version for your current CakePHP version.

Load it from your bootstrap.php file

        Plugin::load('CakeDC/Users', ['routes' => true, 'bootstrap' => true]);

Run migrations to add 2 new tables: 'users' and 'social_accounts'

        bin/cake migrations migrate -p CakeDC/Users

Configuration

Load the Component in your src/Controller/AppController.php

    public function initialize()
    {
        parent::initialize();
        //
        // ...
        //
        $this->loadComponent('CakeDC/Users.UsersAuth');
    }

login page output

Create a new Facebook application

  • Go to Facebook developers and log in
  • Create a new Facebook application new Facebook app
  • Click "website" and select some awesome name for your brand new app (yeah, some random name would work too)
  • Pick a Category, complete the quick start form, etc.
  • Once you are done, go to your newly created app and click "settings"
  • In settings, you should add your domain to "App domains" and ensure there is at least one login platform = "Website" defined
  • Copy your App ID and secret

Setup the Plugin to use your Facebook app for login

Now you have a working Facebook app configured, we are going to link the CakeDC Users Plugin to use the app for login.

Update your bootstrap.php file to customize the CakeDC Users Plugin

        Configure::write('Users.config', ['users']);
        Plugin::load('CakeDC/Users', ['routes' => true, 'bootstrap' => true]);

Create a new "config/users.php" file with contents

    return [
        'Opauth.Strategy.Facebook.app_id' => 'YOUR APP ID',
        'Opauth.Strategy.Facebook.app_secret' => 'YOUR APP SECRET',
        //etc
    ];

This file will override any configuration key present in the Plugin, you can check the configuration options here Configuration.

You are done!

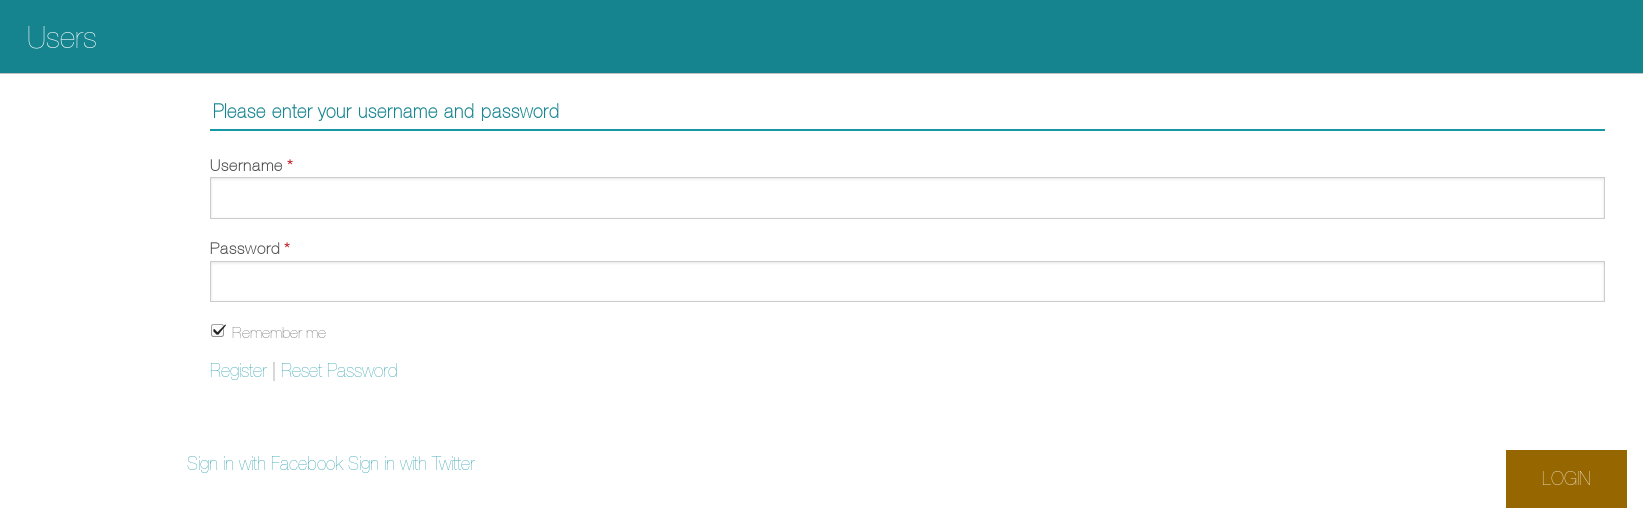
Now the "login with Facebook" link (in "/login" page) will open the Facebook login popup and connect back to your application. If the email is provided by the user, he'll be automatically registered using the default role = 'user'. If no email is provided, the user will be requested to enter an email to complete the registration process in your application. Once his email is validated (link sent via email), he'll be able to login using Facebook.

Read more about CakeDC Users Plugin

Giving back to the community

This Plugin's development has been sponsored by the Cake Development Corporation. Contact us if you are interested in:

  • Professional, commercial CakePHP development and consultancy
  • Professional CakePHP training
  • CakePHP code reviews

We hope you've enjoyed this short tutorial covering the Facebook login, stay tunned for new CakePHP + Users Plugin tutorials coming soon...


Latest articles

The Inflector (Or why CakePHP speaks better English than me)

This article is part of the CakeDC Advent Calendar 2025 (December 18th 2025) I have been working with CakePHP for more than 15 years now. I love the conventions. I also love that I don't have to configure every single XML file, like in the old Java days. But let's be honest: as a Spanish native speaker, naming things in English can sometimes be a nightmare. In Spanish, life is simple. You have a Casa (house), you add an "s", you have Casas (houses). You have a Camión (truck), you add "es", you have Camiones (trucks). Logic! But in English? You have a mouse, and suddenly you have mice. You have a person, and it becomes people. You have a woman and it becomes women. This is why the Inflector class is not just a utility for me. It is my personal English teacher living inside the /vendor folder.

It covers my back

When I started with CakePHP 15 years ago, I was always scared to name a database table categories. I was 100% sure that I would break the framework because I would name the model Categorys or something wrong. But! CakePHP knows better. It knows irregular verbs and weird nouns better than I do. use Cake\\Utility\\Inflector; // The stuff I usually get right echo Inflector::pluralize('User'); // Users // The stuff I would definitely get wrong without coffee echo Inflector::pluralize('Person'); // People echo Inflector::pluralize('Child'); // Children

Variable Naming (CamelCase vs underscore)

The other battle I have fought for 15 years is the variable naming convention. Is it camelCase? Is it PascalCase? Is it underscore_case? My brain thinks in Spanish, translates to English, and then tries to apply PSR-12 standards. It is a lot of processing power. Fortunately, when I am building dynamic tools, I just let the Inflector handle the formatting: // Converting my database column to a nice label echo Inflector::humanize('published_date'); // Output: Published Date // Converting a string to a valid variable name echo Inflector::variable('My Client ID'); // Output: myClientId

When Spanglish happens

Of course, after so many years, sometimes a Spanish word slips into the database schema. It happens to the best of us. If I create a table called alumnos (students), CakePHP tries its best, but it assumes it is English.
Inflector::singularize('alumnos') -> Alumno (It actually works! Lucky.)
But sometimes it fails funny. If I have a Jamon (Ham), Cake thinks the plural is Jamons. So, for those rare moments where my English fails, I can teach the Inflector a bit of Spanish in bootstrap.php: Inflector::rules('plural', \[ '/on$/i' \=\> 'ones' // Fixing words ending in 'on' like Cajon, Jamon... \]);

Conclusion

We talk a lot about the ORM, Dependency Injection, and Plugins. Today however, I wanted to say "Gracias" to the humble Inflector. It has saved me from typos and grammar mistakes since 2008. Challenge for today: Go check your code. Are you manually formatting strings? Stop working so hard and let the Inflector do it for you. This article is part of the CakeDC Advent Calendar 2025 (December 18th 2025)

Uploading Files with CakePHP and Uppy directly to Amazon S3

Uploading Files with CakePHP and Uppy: Direct to S3

Modern web applications increasingly require fast, resilient, and user‑friendly file uploads. Whether it’s profile photos, documents, or large media files, users expect progress indicators, drag‑and‑drop, and reliable uploads even on unstable connections. In this article, we’ll look at how to combine CakePHP on the backend with Uppy on the frontend, and how to upload files directly to Amazon S3 using signed requests.

Why Uppy for Direct S3 Uploads??

Uppy is a modular JavaScript file uploader built by the team behind Transloadit. It provides a polished upload experience out of the box and integrates well with modern backends.

Key advantages

  • Direct-to-Cloud Uploads: File data flows directly from the user's browser to the S3 bucket, without passing through your CakePHP server.
    • Lower Server Load and Cost: Your server only generates a short-lived, secure pre-signed URL. The actual file transfer avoids the “double handling,” drastically reducing your application's bandwidth consumption and infrastructure footprint.
    • Better Performance: By eliminating your application server as a middleman, uploads complete faster. Uppy can also utilize S3's multipart upload capabilities for improved throughput and reliability for large files.
  • Excellent UX: Drag-and-drop support, progress bars, previews, and retry support.
  • Modular Architecture: Only load the necessary plugins.
  • Framework‑agnostic: Works seamlessly with CakePHP.

Architecture Overview

  • This scalable and production-friendly approach uses the following flow:
  • The browser initializes Uppy.
  • CakePHP provides temporary S3 credentials or signed URLs (Authorization).
  • Uppy uploads files directly to S3 (Data Transfer).
  • CakePHP stores metadata (filename, path, size, etc.) if needed (Database Record).

Architecture Overview

This scalable and production-friendly approach uses the following flow:
  1. The browser initializes Uppy
  2. CakePHP provides temporary S3 credentials or signed URLs (Authorization)
  3. Uppy uploads files directly to S3 (Data Transfer).
  4. CakePHP stores metadata (filename, path, size, etc.) if needed (Database Record).

Prerequisites

  • CakePHP 5.x (or 4.x with minor adjustments)
  • AWS account with an S3 bucket
  • AWS SDK for PHP
  • A modern browser to use Uppy's MJS modules

Installing Dependencies

Backend (CakePHP)

Install the required AWS SDK for PHP via Composer: composer require aws/aws-sdk-php Configure your AWS credentials (environment variables recommended): AWS_ACCESS_KEY_ID=your-key AWS_SECRET_ACCESS_KEY=your-secret AWS_REGION=eu-west-1 AWS_BUCKET=your-bucket-name

Frontend (Uppy)

Instead of a build step, we will use Uppy's modular JS files directly from a Content Delivery Network (CDN), which is simpler for many CakePHP applications. We will load the required modules—Uppy, Dashboard, and AwsS3—directly within the <script type="module"> tag in your view.

Creating the CakePHP Endpoint

We need a CakePHP endpoint to securely generate and return the necessary S3 upload parameters (the pre-signed URL) to the browser.

Controller

// src/Controller/UploadsController.php namespace App\Controller; use Aws\S3\S3Client; use Cake\Http\Exception\UnauthorizedException; class UploadsController extends AppController { public function sign() { $this->getRequest()->allowMethod(['post']); // 1. Initialize S3 Client using credentials from environment $s3Client = new S3Client([ 'version' => 'latest', 'region' => env('AWS_REGION'), 'credentials' => [ 'key' => env('AWS_ACCESS_KEY_ID'), 'secret' => env('AWS_SECRET_ACCESS_KEY'), ], ]); // Define a unique path with a placeholder for the actual filename $path = 'uploads/' . uniqid() . '/${filename}'; // 2. Create the command for a PutObject request $command = $s3->getCommand('PutObject', [ 'Bucket' => env('AWS_BUCKET');, 'Key' => $path, 'ACL' => 'private', 'ContentType' => '${contentType}', ]); // 3. Generate the pre-signed URL (valid for 15 minutes) $presignedRequest = $s3->createPresignedRequest($command, '+15 minutes'); $this->set([ 'method' => 'PUT', 'url' => (string)$presignedRequest->getUri(), '_serialize' => ['method', 'url'], ]); } } Add a route: // config/routes.php $routes->post('/uploads/s3-sign', ['controller' => 'Uploads', 'action' => 'sign']);

Frontend: Initializing Uppy and the S3 Plugin

Place the following code in your CakePHP view along with the HTML container for the uploader: <div id="uploader"></div> <script type="module"> // Load Uppy modules directly from CDN (v5.2.1 example) import { Uppy, Dashboard, AwsS3 } from 'https://releases.transloadit.com/uppy/v5.2.1/uppy.min.mjs' const uppy = new Uppy({ autoProceed: false, restrictions: { maxNumberOfFiles: 5, allowedFileTypes: ['image/*', 'application/pdf'], }, }) uppy.use(Dashboard, { inline: true, target: '#uploader', }) // Configure the AwsS3 plugin to fetch parameters from the CakePHP endpoint uppy.use(AwsS3, { async getUploadParameters(file) { const response = await fetch('/uploads/s3-sign', { method: 'POST', headers: { 'Content-Type': 'application/json', }, }) const data = await response.json() // 2. Return the parameters Uppy needs for the direct upload return { method: data.method, url: data.url, headers: { 'Content-Type': file.type, }, } }, }) uppy.on('complete', (result) => { console.log('Upload complete:', result.successful) }) </script>

Storing File Metadata (Optional but Recommended)

Once the direct S3 upload is successful, you must notify your CakePHP application to save the file's metadata (e.g., the S3 key) in your database. uppy.on('upload-success', (file, response) => { fetch('/files/save', { method: 'POST', headers: { 'Content-Type': 'application/json' }, body: JSON.stringify({ name: file.name, size: file.size, type: file.type, s3_key: response.uploadURL, }), }) })

Security Considerations

Remember to implement robust security checks in your sign controller action:
  • Authenticate users: Ensure the user is logged in and authorized before issuing S3 parameters.
  • Restrict Input: Restrict allowed MIME types and maximum file size.
  • Access Control: Use private S3 buckets and serve files via signed URLs to maintain security.
  • Time Limit: Set short expiration times for the pre-signed requests (e.g., the +15 minutes in the example).

Conclusion

Combining CakePHP and Uppy gives you the best of both worlds: a robust PHP backend and a modern, user‑friendly upload experience. By uploading directly to Amazon S3, you reduce server load, successfully reduce server load, improve scalability, and ensure reliable, fast large file uploads. This setup allows your backend to focus on validation, authorization, and business logic rather than raw data transfer.

Window functions

This article is part of the CakeDC Advent Calendar 2025 (December 15th 2025) Did you ever wanted to provide a partial result as part of an existing report? Window functions were added in CakePHP 4.1 and provide a way to pull a rolling result expressed naturally using the ORM. We'll use CakePHP 5 code in this article. Apart from the examples described in the book https://book.cakephp.org/5/en/orm/query-builder.html#window-functions One common scenario where window functions are very useful are rolling results. Imagine we have a transactions table, where account transactions are stored including a dollar amount of the transaction. The following migration would describe an example transactions table class CreateTransactions extends \Migrations\BaseMigration { public function change(): void { $table = $this->table('transactions'); $table ->addColumn('occurred_on', 'date', [ 'null' => false, ]) ->addColumn('debit_account', 'string', [ 'limit' => 255, 'null' => false, ]) ->addColumn('credit_account', 'string', [ 'limit' => 255, 'null' => false, ]) ->addColumn('amount_cents', 'biginteger', [ 'null' => false, 'signed' => false, ]) ->addColumn('currency', 'string', [ 'limit' => 3, 'null' => false, 'default' => 'USD', ]) ->addColumn('reference', 'string', [ 'limit' => 255, 'null' => true, ]) ->addColumn('description', 'string', [ 'limit' => 255, 'null' => true, ]) ->addTimestamps('created', 'modified') ->addIndex(['occurred_on'], ['name' => 'idx_transactions_occurred_on']) ->addIndex(['debit_account'], ['name' => 'idx_transactions_debit_account']) ->addIndex(['credit_account'], ['name' => 'idx_transactions_credit_account']) ->addIndex(['reference'], ['name' => 'idx_transactions_reference']) ->create(); } } Now, let's imagine we want to build a report to render the transaction amounts, but we also want a rolling total. Using a window function, we could define a custom finder like this one: public function findWindowReport( SelectQuery $query, ?string $account, ?Date $from, ?Date $to ): SelectQuery { $q = $query ->select([ 'id', 'occurred_on', 'debit_account', 'credit_account', 'amount_cents', 'currency', 'reference', 'description', ]); // Optional filters if ($account) { $q->where(['debit_account' => $account]); } if ($from) { $q->where(['occurred_on >=' => $from]); } if ($to) { $q->where(['occurred_on <=' => $to]); } $runningWin = (new WindowExpression()) ->partition('debit_account') ->orderBy([ 'occurred_on' => 'ASC', 'id' => 'ASC' ]); $q->window('running_win', $runningWin); $q->select([ 'running_total_cents' => $q ->func()->sum('amount_cents') ->over('running_win'), ]); return $q->orderBy([ 'debit_account' => 'ASC', 'occurred_on' => 'ASC', 'id' => 'ASC' ]); } Note the WindowExpression defined will sum the amount for each debit_account to produce the running_total_cents. The result of the report, after formatting will look like this Occurred On Debit Account Credit Account Amount (USD) Running Total (USD) 1/3/25 assets:bank:checking income:services $2,095.75 $2,095.75 1/3/25 assets:bank:checking income:sales $2,241.42 $4,337.17 1/7/25 assets:bank:checking income:services $467.53 $4,804.70 1/10/25 assets:bank:checking income:subscriptions $2,973.41 $7,778.11 1/12/25 assets:bank:checking income:sales $2,747.07 $10,525.18 1/17/25 assets:bank:checking income:subscriptions $2,790.36 $13,315.54 1/21/25 assets:bank:checking income:subscriptions $1,891.35 $15,206.89 1/28/25 assets:bank:checking equity:owner $353.00 $15,559.89 Other typical applications of window functions are leaderboards (building paginated rankins with scores, sales, activities), analytics for cumulative metrics (like inventory evolution) and comparison between rows (to compute deltas) and de-duplication (to pick the most recent record for example). This is a very useful tool to provide a solution for these cases, fully integrated into the CakePHP ORM. This article is part of the CakeDC Advent Calendar 2025 (December 15th 2025)

We Bake with CakePHP