CakeDC Blog

TIPS, INSIGHTS AND THE LATEST FROM THE EXPERTS BEHIND CAKEPHP

Two Factor Authentication & CakeDC Users Plugin

Why 2FA?

Nowadays we have noticed that many of the websites or applications that we access offer the option to activate an extra layer of security called Two Factor Authentication, better known as 2FA. Most of our lives happen on our mobile devices and laptops, so it’s not a secret that cyber-thieves would like to gain access to our personal and financial data. This is why adding an extra layer for protecting logins is worth it. 

2FA  is an extra layer of security to make sure that someone that is trying to gain access to an account is who they say they are. The first layer is generally a combination of a username and password, and the second layer could ask for a code that is sent to your phone, a fingerprint scan or the name of your best friend.

Currently 2FA has become a security standard in the digital world.

How does it work?

First the user will enter his username and password, then instead of getting in immediately into the system, he will be required to provide  additional information. Which could be one of the following options or factors:

  • Something you know : This could be a password, a personal identification number (PIN), answers to a secret question or a specific keystroke pattern.

  • Something you have: This is something the user owns, a physical device, like a mobile phone, an id card, an usb stick, a token, etc.

  • Something you are: This could be face or voice recognition, retina scan,  fingerprint, DNA, handwriting.

CakeDC Users Plugin and 2FA

There are various ways to implement Time-based One-Time Password (TOTP), Short Message Service (SMS), Electronic Mail (Email),  Universal Second Factor (U2F). CakeDC Users Plugin provides the ability to enable in your site TOTP or U2F. 
 

TOTP Google Authenticator

Enabling 2FA Google Authenticator in CakeDC Users Plugin is quite easy, it just takes a few minutes. In case you have not installed CakeDC Users Plugin in your application, follow the installation steps described here.

Once you have installed the plugin and your basic login is working, you just need to do the following:

  1. Run the next command:

    composer require robthree/twofactorauth

  2. In Application::pluginBootstrap() add the following:

    Configure::write('OneTimePasswordAuthenticator.login', true);


Once you have 2FA enabled in your site, when you try to login will happen next 

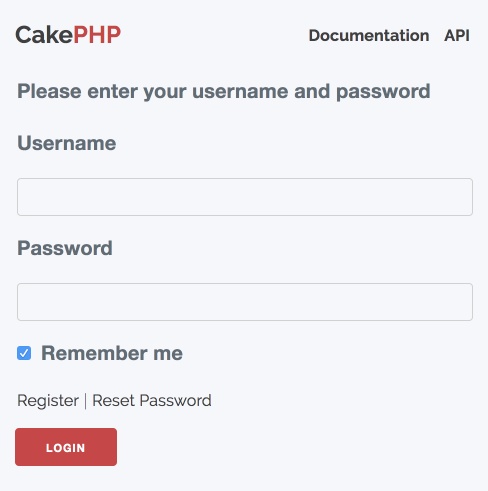
  1. Type your username and password. 


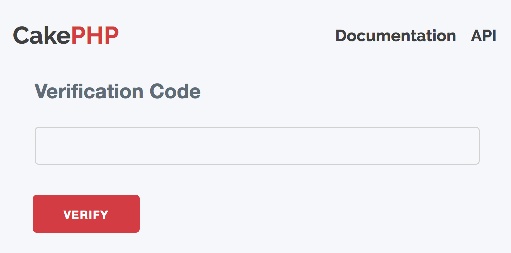
  2. You proceed to the next step where you are asked for the authentication code

    • First time you will be shown a QR code that you need to scan from your authenticator application. 


    • Next time you will only get the input to type your authentication code


  3. You open the authenticator application to get a secondary code called a one-time password (OTP)—usually six characters in length. There are many options in the market for the authenticator application, some of the most used are: Google Authenticator, Duo Mobile, FreeOTP etc.

  4. You type the 6-digit code into the website, and you’re in!


FIDO U2F

If you want something more solid and reliable, then you could use U2F (Universal 2nd Factor) standard created by the FIDO Alliance. With this kind of authentication you use a physical security key, and insert that into your PC, touch the key’s button, and you’re “automatically” logged in. 

U2F standard was implemented in CakeDC Users Plugin by using  the YubiKey, the most famous and common example of U2F.

To enable 2FA via Yubico follow the next steps:

  1. Run the next command:

    composer require yubico/u2flib-server:^1.0

  2. In Application::pluginBootstrap() add the following:

    Configure::write(‘U2f.enabled’, true);
     

Yubico is a hardware based 2FA, it’s a small device with one end that slots into a standard Type-A USB port. You just need to Insert your YubiKey and touch it! You won’t need to manually enter the code.

Take into account that you will need to use https to be able to use 2FA features in your applicatins.

So, what to choose for two-factor authentication? There is no universal answer, it will depend on the level of security you are expecting, but start protecting your account by enabling 2FA! In this article you could noticed how easy is to enable 2FA in any CakePHP application by using CakeDC Users Plugin.


References:

https://github.com/CakeDC/users

https://en.wikipedia.org/wiki/Multi-factor_authentication

https://en.wikipedia.org/wiki/One-time_password

https://en.wikipedia.org/wiki/FIDO_Alliance

https://en.wikipedia.org/wiki/Universal_2nd_Factor


Latest articles

The new CakePHP RateLimitMiddleware

This article is part of the CakeDC Advent Calendar 2025 (December 21st 2025) Rate limiting a specific endpoint of your application can be a life saver. Sometimes you can't optimize the endpoint and it'll be expensive in time or CPU, or the endpoint has a business restriction for a given user. In the past, I've been using https://github.com/UseMuffin/Throttle a number of times to provide rate limiting features to CakePHP. Recently, I've been watching the addition of the RateLimitMiddleware to CakePHP 5.3, I think it was a great idea to incorporate these features into the core and I'll bring you a quick example about how to use it in your projects. Let's imagine you have a CakePHP application with an export feature that will take some extra CPU to produce an output, you want to ensure the endpoint is not abused by your users. In order to limit the access to the endpoint, add the following configuration to your config/app.php // define a cache configuration, Redis could be a good option for a fast and distributed approach 'rate_limit' => [ 'className' => \Cake\Cache\Engine\RedisEngine::class, 'path' => CACHE, 'url' => env('CACHE_RATE_LIMIT_URL', null), ], Then, in your src/Application.php middleware method, create one or many configurations for your rate limits. The middleware allows a lot of customization, for example to select the strategy, or how are you going to identify the owner of the rate limit. ->add(new RateLimitMiddleware([ 'strategy' => RateLimitMiddleware::STRATEGY_FIXED_WINDOW, 'identifier' => RateLimitMiddleware::IDENTIFIER_IP, 'limit' => 5, 'window' => 10, 'cache' => 'rate_limit', 'skipCheck' => function ($request) { return !( $request->getParam('controller') === 'Reports' && $request->getParam('action') === 'index' ); } ])) In this particular configuration we are going to limit the access to the /reports/index endpoint (we skip everything else) to 5 requests every 10 seconds. You can learn more about the middleware configuration here https://github.com/cakephp/docs/pull/8063 while the final documentation is being finished. This article is part of the CakeDC Advent Calendar 2025 (December 21st 2025)

Real-Time Notifications? You Might Not Need WebSockets

This article is part of the CakeDC Advent Calendar 2025 (December 20th 2025) As PHP developers, when we hear "real-time," our minds immediately jump to WebSockets. We think of complex setups with Ratchet, long-running server processes, and tricky Nginx proxy configurations. And for many applications (like live chats or collaborative editing) WebSockets are absolutely the right tool. But, if you don't need all that complexity or if you just want to push data from your server to the client? Think of a new notification, a "users online" counter, or a live dashboard update. For these one-way-street use cases, WebSockets are often overkill. Enter Server-Sent Events (SSE). It's a simple, elegant, and surprisingly powerful W3C standard that lets your server stream updates to a client over a single, long-lasting HTTP connection.

SSE vs. WebSockets: The Showdown

The most important difference is direction.
  • WebSockets (WS): Bidirectional. The client and server can both send messages to each other at any time. It's a two-way conversation.
  • Server-Sent Events (SSE): Unidirectional. Only the server can send messages to the client. It's a one-way broadcast.
This single difference has massive implications for simplicity and implementation.
Feature Server-Sent Events (SSE) WebSockets (WS)
Direction Unidirectional (Server ➔ Client) Bidirectional (Client ⟺ Server)
Protocol Just plain HTTP/S A new protocol (ws://, wss://)
Simplicity High. simple API, complex ops at scale Low. Requires a special server.
Reconnection Automatic! The browser handles it. Manual. You must write JS to reconnect.
Browser API Native EventSource object. Native WebSocket object.
Best For Notifications, dashboards, live feeds. Live chats, multiplayer games, co-editing.
Pros for SSE:
  • It's just HTTP. No new protocol, no special ports.
  • Automatic reconnection is a life-saver.
  • The server-side implementation can be a simple controller action.
Cons for SSE:
  • Strictly one-way. The client can't send data back on the same connection.
  • Some older proxies or servers might buffer the response, which can be tricky.
Infrastructure Note: Since SSE keeps a persistent connection open, each active client will occupy one PHP-FPM worker. For high-traffic applications, ensure your server is configured to handle the concurrent load or consider a non-blocking server like RoadRunner. Additionally, using HTTP/2 is strongly recommended to bypass the 6-connection-per-domain limit found in older HTTP/1.1 protocols

The Implementation: A Smart, Reusable SSE System in CakePHP

We're not going to build a naive while(true) loop that hammers our database every 2 seconds. That's inefficient. Instead, we'll build an event-driven system. The while(true) loop will only check a cache key. This is lightning-fast. A separate "trigger" class will update that cache key's timestamp only when a new notification is actually created. This design is clean, decoupled, and highly performant.
Note: This example uses CakePHP, but the principles (a component, a trigger, and a controller) can be adapted to any framework like Laravel or Symfony.

1. The Explicit SseTrigger Class

First, we need a clean, obvious way to "poke" our SSE stream. We'll create a simple class whose only job is to update a cache timestamp. This is far better than a "magic" Cache::write() call hidden in a model. src/Sse/SseTrigger.php <?php namespace App\Sse; use Cake\Cache\Cache; /** * Provides an explicit, static method to "push" an SSE event. * This simply updates a cache key's timestamp, which the * SseComponent is watching. */ class SseTrigger { /** * Pushes an update for a given SSE cache key. * * @param string $cacheKey The key to "touch". * @return bool */ public static function push(string $cacheKey): bool { // We just write the current time. The content doesn't // matter, only the timestamp. return Cache::write($cacheKey, microtime(true)); } }

CRITICAL PERFORMANCE WARNING: The PHP-FPM Bottleneck

In a standard PHP-FPM environment, each SSE connection is synchronous and blocking. This means one active SSE stream = one locked PHP-FPM worker. If your max_children setting is 50, and 50 users open your dashboard, your entire website will stop responding because there are no workers left to handle regular requests. How to mitigate this: Dedicated Pool: Set up a separate PHP-FPM pool specifically for SSE requests. Go Asynchronous: Use a non-blocking server like RoadRunner, Swoole or FrankenPHP. These can handle thousands of concurrent SSE connections with minimal memory footprint. HTTP/2: Always serve SSE over HTTP/2 to bypass the browser's 6-connection limit per domain.

2. The SseComponent (The Engine)

This component encapsulates all the SSE logic. It handles the loop, the cache-checking, the CallbackStream, and even building the final Response object. The controller will be left perfectly clean. To handle the stream, we utilize CakePHP's CallbackStream. Unlike a standard response that sends all data at once, CallbackStream allows us to emit data in chunks over time. It wraps our while(true) loop into a PSR-7 compliant stream, enabling the server to push updates to the browser as they happen without terminating the request. src/Controller/Component/SseComponent.php <?php namespace App\Controller\Component; use Cake\Controller\Component; use Cake\Http\CallbackStream; use Cake\Cache\Cache; use Cake\Http\Response; class SseComponent extends Component { protected $_defaultConfig = [ 'poll' => 2, // How often to check the cache (in seconds) 'eventName' => 'message', // Default SSE event name 'heartbeat' => 30, // Keep-alive to prevent proxy timeouts ]; /** * Main public method. * Builds the stream and returns a fully configured Response. */ public function stream(callable $dataCallback, string $watchCacheKey, array $options = []): Response { $stream = $this->_buildStream($dataCallback, $watchCacheKey, $options); // Get and configure the controller's response $response = $this->getController()->getResponse(); $response = $response ->withHeader('Content-Type', 'text/event-stream') ->withHeader('Cache-Control', 'no-cache') ->withHeader('Connection', 'keep-alive') ->withHeader('X-Accel-Buffering', 'no') // For Nginx: disable response buffering ->withBody($stream); return $response; } /** * Protected method to build the actual CallbackStream. */ protected function _buildStream(callable $dataCallback, string $watchCacheKey, array $options = []): CallbackStream { $config = $this->getConfig() + $options; return new CallbackStream(function () use ($dataCallback, $watchCacheKey, $config) { set_time_limit(0); $lastSentTimestamp = null; $lastHeartbeat = time(); while (true) { if (connection_aborted()) { break; } // 1. THE FAST CHECK: Read the cache. $currentTimestamp = Cache::read($watchCacheKey); // 2. THE COMPARE: Has it been updated? if ($currentTimestamp > $lastSentTimestamp) { // 3. THE SLOW CHECK: Cache is new, so run the data callback. $data = $dataCallback(); // 4. THE PUSH: Send the data. echo "event: " . $config['eventName'] . "\n"; echo "data: " . json_encode($data) . "\n\n"; $lastSentTimestamp = $currentTimestamp; $lastHeartbeat = time(); } else if (time() - $lastHeartbeat > $config['heartbeat']) { // 5. THE HEARTBEAT: Send a comment to keep connection alive. echo ": \n\n"; $lastHeartbeat = time(); } if (ob_get_level() > 0) { ob_flush(); } flush(); // Wait before the next check sleep($config['poll']); } }); } }

3. Connecting the Logic (Model & Controller)

First, we use our SseTrigger in the afterSave hook of our NotificationsTable. This makes it clear: "After saving a notification, push an update." src/Model/Table/NotificationsTable.php (Partial) use App\Sse\SseTrigger; // Don't forget to import! public function afterSave(EventInterface $event, Entity $entity, ArrayObject $options) { // Check if the entity has a user_id if ($entity->has('user_id') && !empty($entity->user_id)) { // Build the user-specific cache key $userCacheKey = 'notifications_timestamp_user_' . $entity->user_id; // Explicitly trigger the push! SseTrigger::push($userCacheKey); } } Now, our controller action becomes incredibly simple. Its only jobs are to get the current user, define the data callback, and return the component's stream. src/Controller/NotificationsController.php <?php namespace App\Controller; use App\Controller\AppController; use Cake\Http\Exception\ForbiddenException; class NotificationsController extends AppController { public function initialize(): void { parent::initialize(); $this->loadComponent('Sse'); $this->loadComponent('Authentication.Authentication'); } public function stream() { $this->autoRender = false; // 1. Get authenticated user $identity = $this->Authentication->getIdentity(); if (!$identity) { throw new ForbiddenException('Authentication required'); } // 2. Define user-specific parameters $userId = $identity->get('id'); $userCacheKey = 'notifications_timestamp_user_' . $userId; // 3. Define the data callback (what to run when there's an update) $dataCallback = function () use ($userId) { return $this->Notifications->find() ->where(['user_id' => $userId, 'read' => false]) ->order(['created' => 'DESC']) ->limit(5) ->all(); }; // 4. Return the stream. That's it! return $this->Sse->stream( $dataCallback, $userCacheKey, [ 'eventName' => 'new_notification', // Custom event name for JS 'poll' => 2 ] ); } }

4. The Frontend (The Easy Part)

Thanks to the native EventSource API, the client-side JavaScript is trivial. No libraries. No complex connection management. <script> // 1. Point to your controller action const sseUrl = '/notifications/stream'; const eventSource = new EventSource(sseUrl); // 2. Listen for your custom event eventSource.addEventListener('new_notification', (event) => { console.log('New data received!'); const notifications = JSON.parse(event.data); // Do something with the data... // e.g., update a <ul> list or a notification counter updateNotificationBell(notifications); }); // 3. (Optional) Handle errors eventSource.onerror = (error) => { console.error('EventSource failed:', error); // The browser will automatically try to reconnect. }; // (Optional) Handle the initial connection eventSource.onopen = () => { console.log('SSE connection established.'); }; </script>

Ideas for Your Projects

You can use this exact pattern for so much more than just notifications:
  • Live Admin Dashboard: A "Recent Sales" feed or a "Users Online" list that updates automatically.
  • Activity Feeds: Show "John recently commented..." in real-time.
  • Progress Indicators: For a long-running background process (like video encoding), push status updates ("20% complete", "50% complete", etc.).
  • Live Sports Scores: Push new scores as they happen.
  • Stock or Crypto Tickers: Stream new price data from your server.

When NOT to Use SSE: Know Your Limits

While SSE is an elegant solution for many problems, it isn't a silver bullet. You should avoid SSE and stick with WebSockets or standard Polling when:
  • True Bidirectional Communication is Required: If your app involves heavy "back-and-forth" (like a fast-paced multiplayer game or a collaborative whiteboarding tool), WebSockets are the correct choice.
  • Binary Data Streams: SSE is a text-based protocol. If you need to stream raw binary data (like audio or video frames), WebSockets or WebRTC are better suited.
  • Legacy Browser Support (IE11): If you must support older browsers that lack EventSource and you don't want to rely on polyfills, SSE will not work.
  • Strict Connection Limits: If you are on a restricted shared hosting environment with very few PHP-FPM workers and no support for HTTP/2, the persistent nature of SSE will quickly exhaust your server's resources.

Conclusion

WebSockets are a powerful tool, but they aren't the only tool. For the wide array of use cases that only require one-way, server-to-client communication, Server-Sent Events are a simpler, more robust, and more maintainable solution. It integrates perfectly with the standard PHP request cycle, requires no extra daemons, and is handled natively by the browser. So the next time you need real-time updates, ask yourself: "Do I really need a two-way conversation?" If the answer is no, give SSE a try. This article is part of the CakeDC Advent Calendar 2025 (December 20th 2025)

QA vs. Devs: a MEME tale of the IT environment

QA testing requires knowledge in computer science but still many devs think of us like  homer-simpson-meme   BUT... morpheus-meme   It is not like we want to detroy what you have created but... house-on-fire-meme   And we have to report it, it is our job... tom-and-jerry-meme   It is not like we think dev-vs-qa   I mean cat-meme   Plaeas do not consider us a thread :) willy-wonka-meme 0/0/0000 reaction-to-a-bug   Sometimes we are kind of lost seeing the application... futurama-meme   And sometimes your don't believe the crazy results we get... ironman-meme   I know you think aliens-meme   But remmember we are here to help xD the-office-meme   Happy Holidays to ya'll folks! the-wolf-of-wallstreet-meme   PS. Enjoy some more memes   feature-vs-user   hide-the-pain-harold-meme   idea-for-qa   peter-parker-meme   meme   dev-estimating-time-vs-pm    

We Bake with CakePHP