CakeDC Blog

How to push Docker image to Container Registry and create App on DigitalOcean Platform Apps

The title speaks for itself, let’s jump right in!

As a preliminary step, we start from a user registered in DigitalOcean with a validated account.

Use the doctl tool for the entire communication process with DigitalOcean.

Step 1: Install doctl

$ cd ~
$ wget https://github.com/digitalocean/doctl/releases/download/v1.71.0/doctl-1.71.0-linux-amd64.tar.gz
$ tar xvf doctl-1.71.0-linux-amd64.tar.gz
$ sudo mv doctl /usr/local/bin


Step 2: Create an API token


Go to https://cloud.digitalocean.com/account/api/tokens

Generate new token for read and write and save apart the value of token generated

<TOKEN NAME>: personaltoken 
<TOKEN VALUE>: 6e981fc2a674dbb7a610b9b85d0c8b00

Step 3: Use the API token to grant account access to doctl

$ doctl auth init --context personaltoken
Validating token... OK

Prompt for <TOKEN VALUE>, then enter it and press return 
 

Step 4: Validate that doctl is working

$ doctl auth init 

Validating token... OK


Prompt for <TOKEN VALUE>, then enter it and press return 

Validate by obtaining the account information

$ doctl account get

Email      Droplet Limit    Email Verified    UUID         Status

[email protected]    10     true     5415bbf8-d501-4096-9b75-ab781c017948    active


Step 5: Create a Container Registry with doctl

<MY-REGISTRY-NAME> : container-nyc-795

<REGION> : nyc3

$ doctl registry create container-nyc-795 --region nyc3

Name       Endpoint        Region slug

container-nyc-795    registry.digitalocean.com/container-nyc-795    nyc3


Important: the region of the Container registry and Kubernetes cluster MUST be the same

Keep in mind that container names must be unique, must be lowercase, and only accepts alphanumeric characters and hyphens.


Step 6: Login to authenticate docker with your registry

$ doctl registry login
Logging Docker in to registry.digitalocean.com


Step 7: Create kubernetes cluster

$ doctl kubernetes cluster create cluster-static-example --region nyc3

Notice: Cluster is provisioning, waiting for cluster to be running

...................................................................

Notice: Cluster created, fetching credentials

Notice: Adding cluster credentials to kubeconfig file found in "/home/andres/.kube/config"

Notice: Setting current-context to do-nyc3-cluster-static-example

ID                                      Name                      Region    Version        Auto Upgrade    Status     Node Pools

d24f180b-6007-4dbc-a2fe-3952801570aa    cluster-static-example    nyc3      1.22.7-do.0    false           running    cluster-static-example-default-pool

Important: the region of the Container registry and Kubernetes cluster MUST be the same here as well. 

This operation isn’t a fast process.


Step 8: Integrate kubernetes cluster in Container register

$ doctl kubernetes cluster registry add cluster-static-example


Step 9: Get token certificate and connect to cluster

$ doctl kubernetes cluster kubeconfig save cluster-static-example

Notice: Adding cluster credentials to kubeconfig file found in "/home/andres/.kube/config"

Notice: Setting current-context to do-nyc3-cluster-static-example

To validate this, use the kubectl tool to get context. If is not installed, get the last version you find - for example in googleapis

$ wget https://storage.googleapis.com/kubernetes-release/release/v1.23.5/bin/linux/amd64/kubectl
$ chmod +x kubectl
$ sudo mv kubectl /usr/local/bin/

Check with

$ kubectl config current-context
do-nyc3-cluster-static-example

Here, you see: bash prompt do-ny3-cluster-sttic-example. That is the context you created in Step 7
 

Step 10: Generate docker image, tag and push to DigitalOcean

We assume that the user already has docker installed

$ mkdir myapp
$ mkdir myapp/html
$ nano myapp/Dockerfile


Inside Dockerfile put 


FROM nginx:latest
COPY ./html/hello.html /usr/share/nginx/html/hello.htm
l


We create simple Dockerfile with NGINX Server and copy the file hello.html in the default html of nginx


$ nano myapp/html/hello.html


Inside hello.html put


<!DOCTYPE html>

<html>

 <head>

   <title>Hello World!</title>

 </head>

 <body>

   <p>This is an example of a simple HTML page served from the Nginx container.</p>

 </body>

</html>

Then build a docker image file tag with repository and push with docker
 

$ cd myapp
$ docker build -t registry.digitalocean.com/container-nyc-795/static-app .

Sending build context to Docker daemon  3.584kB

Step 1/2 : FROM nginx:latest

latest: Pulling from library/nginx

c229119241af: Pull complete

2215908dc0a2: Pull complete

08c3cb2073f1: Pull complete

18f38162c0ce: Pull complete

10e2168f148a: Pull complete

c4ffe9532b5f: Pull complete

Digest: sha256:2275af0f20d71b293916f1958f8497f987b8d8fd8113df54635f2a5915002bf1

Status: Downloaded newer image for nginx:latest

 ---> 12766a6745ee

Step 2/2 : COPY ./html/hello.html /usr/share/nginx/html/hello.html

 ---> 2b9be913c377

Successfully built 2b9be913c377

Successfully tagged registry.digitalocean.com/container-nyc-795/static-app:latest


$ docker images

REPOSITORY                                               TAG       IMAGE ID       CREATED         SIZE

registry.digitalocean.com/container-nyc-795/static-app   latest    2b9be913c377   2 minutes ago   142MB


$ docker push registry.digitalocean.com/container-nyc-795/static-app

Using default tag: latest

The push refers to repository [registry.digitalocean.com/container-nyc-795/static-app]

ac03ae036a53: Pushed

ea4bc0cd4a93: Pushed

fac199a5a1a5: Pushed

5c77d760e1f4: Pushed

33cf1b723f65: Pushed

ea207a4854e7: Pushed

608f3a074261: Pushed

latest: digest: sha256:22615ad4c324ca5dc13fe2c3e1d2d801bd166165e3809f96ed6a96a2b2ca2748 size: 1777


Step 11: Create app

Create file example-static-app.yaml and insert:

alerts:                                 
- rule: DEPLOYMENT_FAILED               
- rule: DOMAIN_FAILED                   
name: example-static-app                
region: nyc                             
services:                               
- http_port: 80                         
  image:                                
    registry_type: DOCR                 
    repository: static-app              
    tag: latest                         
  instance_count: 2                     
  instance_size_slug: professional-xs   
  name: static-service                  
  routes:                               
  - path: /                             
  source_dir: /             
             

Validate file with

$  doctl apps spec validate example-static-app.yaml

Create app

$ doctl apps create --spec example-static-app.yaml
Notice: App created
ID        Spec Name             Default Ingress    Active Deployment ID    In Progress Deployment ID    Created At     Updated At
55a7cb68-65b7-4ff1-b6af-388cdb1df507    example-static-app   2022-03-30 09:34:01.288257225 +0000 UTC    2022-03-30 09:34:01.288257225 +0000 UTC

If you access https://cloud.digitalocean.com/apps

And in the live url + /hello.html you can see:

Step 12: Deploy app

If you modify the code of your app, you need to generate a new image with docker and push  (see step 10). Then you don’t need to create a new app, you need to deploy the image in the already created app, with the id executing the command to deploy in bash.

$  doctl apps create-deployment 55a7cb68-65b7-4ff1-b6af-388cdb1df507


How to generate deploy of Docker image to Container Registry on DigitalOcean Platform Apps

Once you have created the application (and if you have the code in gitlab), you can create a direct deployment of your code in the DigitalOcean container and deploy on top of your application.

Step 1: Define variables

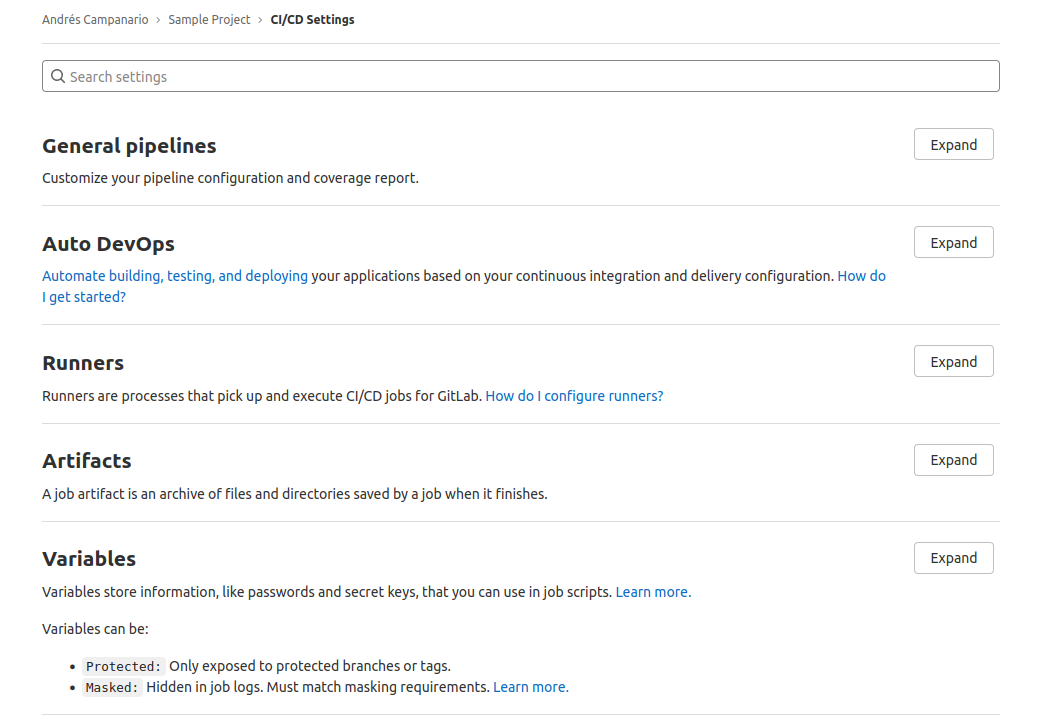
First two variables are defined in gitlab. You can find these inside project in the left menu - enter in Settings > CI/CD > Variables

$DIGITALOCEAN_API_KEY = token generated in DigitalOcean dashboard

$APP_ID = previously generated application identifier


More can be defined as the name of the repository. The value of these variables will be injected into the file that we will create below in the Step 3


Step 2: Register runner in gitlab

In your project in the left menu, go to Settings > CI/CD > Runners

Create a specific runner for the project in the URL with registration token. Register GitLab Runner from the command line. It is important to use docker and privileged

# Download the binary for your system
sudo curl -L --output /usr/local/bin/gitlab-runner https://gitlab-runner-downloads.s3.amazonaws.com/latest/binaries/gitlab-runner-linux-amd64

# Give it permission to execute
sudo chmod +x /usr/local/bin/gitlab-runner

# Register runner
sudo gitlab-runner register -n --url https://git.cakedc.com --registration-token GR1348941gx7sgV3pZFQgRqg5qUR_ --executor docker --description "My Docker Runner" --docker-image "docker:19.03.12" --docker-privileged --docker-volumes "/certs/client"


Step 3: Create file gitlab-ci.yml 

The gitlab-ci.yml file takes care of

  • Authentication and identification using doctl in DigitalOcean

  • Generating and sending the docker image to the DigitalOcean container

  • Deploying the container image to an existing app

Create the file gitlab-ci.yml in the root of your project as

image: docker:20-dind

variables:
  DOCKER_HOST: tcp://docker:2375
  DOCKER_DRIVER: overlay2
  DOCKER_TLS_CERTDIR: ""
  REPOSITORY_URL: registry.digitalocean.com/container-nyc-795/static-app
  CONTAINER_NAME: static-app

services:
  - name: docker:20-dind
    alias: docker
    command: ["--tls=false"]

before_script:
  - apk update
  - apk upgrade
  - apk add doctl --repository=http://dl-cdn.alpinelinux.org/alpine/edge/community
  - docker info

build:
  stage: build
  script:
    - doctl auth init --access-token $DIGITALOCEAN_API_KEY
    - doctl account get     
    - echo $DIGITALOCEAN_API_KEY | docker login -u $DIGITALOCEAN_API_KEY --password-stdin registry.digitalocean.com
    - docker build -t $REPOSITORY_URL:latest .
    - docker push $REPOSITORY_URL
    - doctl apps create-deployment $APP_ID

Now, every time you do a git push in your project, the runner will automatically inject the variables defined previously in the gitlab-ci.yml file. Then, it will generate a docker image with docker (docker-in-docker) to create an image of your project, send it to the digitalocean repository and deploy it in the app configured.


That’s it!


Back to all articles
We Bake with CakePHP